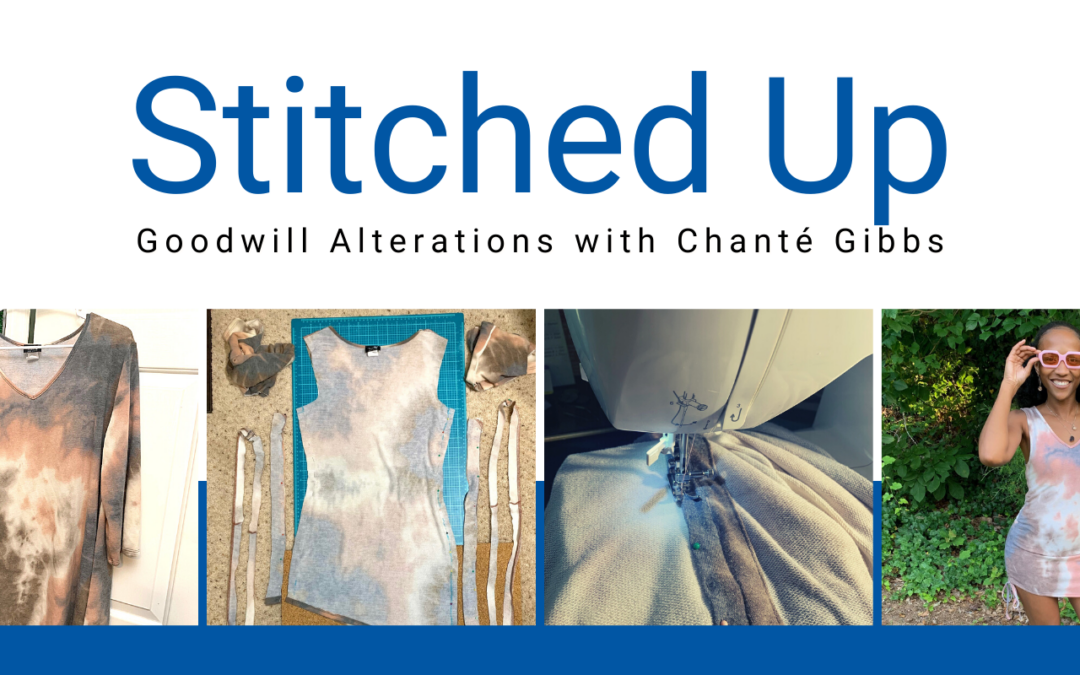
Goodwill Alterations with Chanté Gibbs
Chanté is a local thrift blogger and sustainable designer. She is our inspiration and guide to exploring what can be done with some creative alterations and updates of thrifted finds. Each month she starts with a concept, shops our stores, and reworks her thrift finds into high-fashion pieces.
She takes us on a thrift journey from start to finish, and it’s a great ride every month!
Explain your process for selecting the item from our store. What drew you to it?
When I went to Goodwill this month, my focus was on finding an oversized shirt that I could upcycle into a dress.
I knew I needed to find a shirt that was at least two sizes bigger than me and had a lot of stretch to it. After searching through the dress and women’s shirts racks, I finally found a really soft tie dye shirt with an interesting pattern. The shirt was stretchy, big enough, and had an interesting pattern.


Tell us about your design process.
I washed the shirt and laid it out on my cutting board with one of my dresses from my closet on top. I chose a sleeveless dress that already fit me well to lay out the new dress’s pattern.
Next I pinned the dress to the shirt, started tracing the dress down the sides, and marked my seam allowance. I left about 1 inch of seam allowance for the sides of the dress. I originally made these markings on the outside of the shirt when I was doing this project, but I recommend turning it inside out before doing this step.
Once I had drawn the new armholes on the shirt, it was time to cut.
First I sewed both of the side seams from the armhole to the bottom of the dress. Then I sewed along where I had pinned the armholes. Luckily, the shirt already had a nice v-neckline that I knew would look great on the dress.
For the drawstrings, I went back to my extra fabric from cutting the sides and cut two new long pieces the same length as the new dress to make the casings. Since the pieces I had just cut had two layers of fabric, I joined them back together by sewing each side.
Then with wrong sides facing each other, I placed one of the casings on top of the left side seam. I used straight stitch to sew it to the middle of the side seam, matching right along the seam line. Before doing the other side of the dress, I went ahead and hemmed and sewed both sides of these new rectangular pieces to create a casing for the strings to go up and back down to create the ruching.
For the strings, I cut two long straps from the leftover fabric and used a threader to insert the straps through the new side casings. Don’t forget to attach your new drawstrings near the top once they are in place!


What was your inspiration for the finished piece?
Since summer is FINALLY here, I started looking though all the new vacation styles. I noticed drawstring ruching being implemented on summer dresses and two-piece sets.
Any parting thoughts or quotes for readers this month?
Here’s a Few Extra Tips on Practicing Sustainable Fashion!
– Try clothing swaps with friends & family.
– Be knowledgeable on sustainable clothing brands when you go to shop.
– Look for re-wearable outfits from what’s already in your closet.
– Learn more about upcycling and mending your clothes.
– Advocate for change in the fast-fashion industry and for holding companies accountable.
– When you’re done with an item of clothing, don’t forget to donate!