Goodwill Alterations with Chanté Gibbs
Chanté is a local thrift blogger and sustainable designer. She is our inspiration and guide to exploring what can be done with some creative alterations and updates of thrifted finds. Each month she starts with a concept, shops our stores, and reworks her thrift finds into high-fashion pieces.
She takes us on a thrift journey from start to finish, and it’s a great ride every month!
Explain your process for selecting the item from our store. What drew you to it?
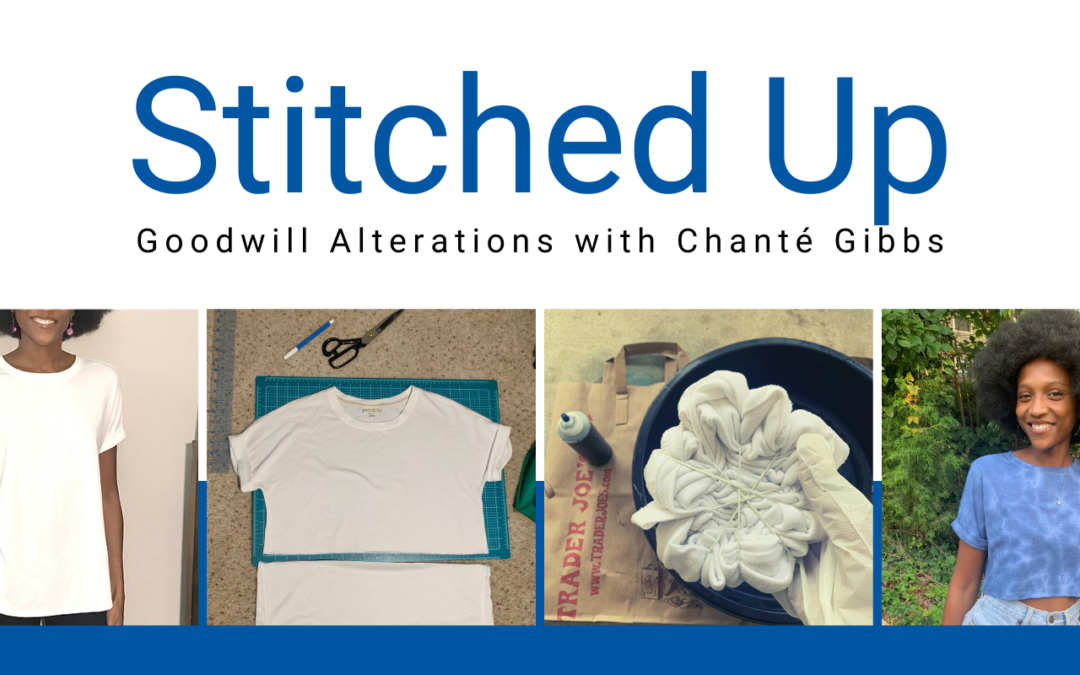
I went to Goodwill focused on finding a white shirt that I could upcycle into a crop top. I wanted the shirt to be white so it could be easier for me to tie dye. While searching through the women’s t-shirt section, I looked for a soft shirt in good condition that was also long enough for me to create a crop top out of it.
")
")
")
Tell us about your design process.
Creating the New Shape
I washed the t-shirt and tried it on to see how much I wanted to cut off. Once I made a mark at the desired length, I placed the shirt on my cutting board. Since the t-shirt was white, I grabbed my washable marker instead of using chalk here.
Next, starting where I had marked earlier, I used my see-through ruler and marker to create a horizontal line. Then I used my shears to cut along the line I just made to create the new bottom of my top.
Dyeing the Top
First, I pinched the middle of the shirt with two fingers, twisted it into a flat spiral, and bound the shirt into a circle with rubber bands.
Luckily, I had a beautiful deep blue dye left over from a tie dye kit to use it for this project.
I grabbed my gloves and poured water into the dye bottle from the kit, then lightly shook the bottle to make sure the dye was fully dissolved. With a plastic container underneath, I applied the dye to the top of the wrapped shirt, then flipped it over to dye again on both sides. I wanted the crop top to be completely blue, so I used quite a bit of dye at this stage.
Then I covered the shirt inside plastic bags to keep it damp and let it sit for 6-8 hours. After I rinsed the shirt in the sink until there was no excess dye, I cut the rubber bands. Lastly, I washed the shirt by itself in hot water with a small amount of detergent.
")
")
")
What was your inspiration for the finished piece?
When I was in high school, I used to tie dye my track and volleyball team’s uniforms every game day. When I noticed tie dye trending again, I knew this design would be great for a crop top!
Any parting thoughts or quotes for readers this month?
Here’s A Few Tie-Dye Tips!
– Always use a pair of gloves when working with dyes.
– For an easier dying process, use clothes made of natural fibers (e.g., cotton, rayon, silk, wool).
– If you purchase a tie dye kit, you can reuse the bottles by rinsing out the previous color and refilling it with a new dye packet.
Credits:
")